
Video Track
One of the major re-imaginings ADD needed to accomplish to make sound for video fast and intuitive was allowing Tracks and Regions to work independently as well as together. This section will explain the different types of tracks, how to use tracks like a traditional DAW, and how to work with individual regions to gain personalized control over your sounds.
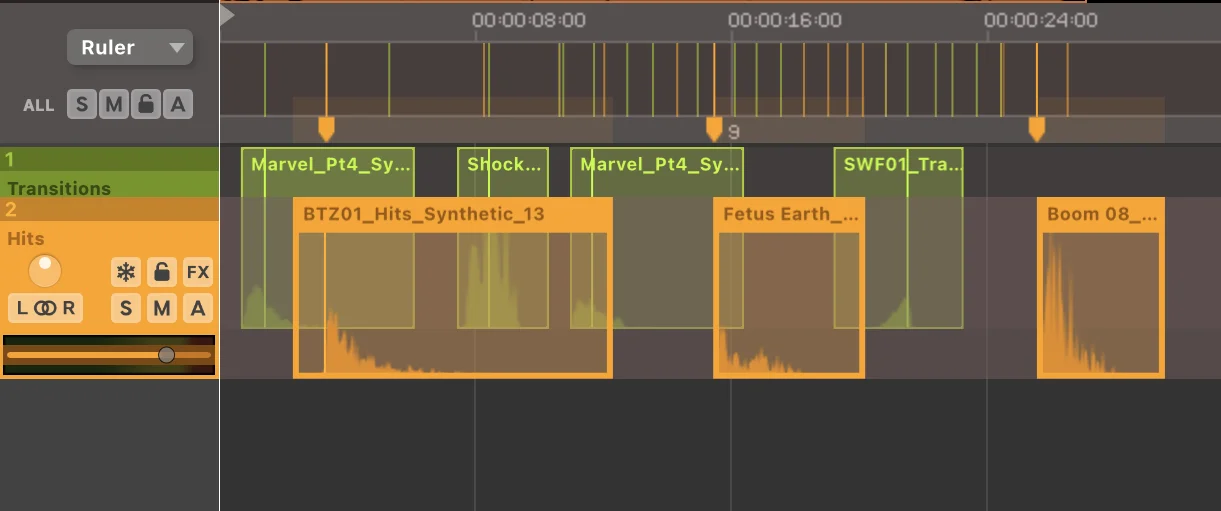
The Video Track previews frames of the video and the waveform of the attached audio and the header gives you basic functions to control and adjust the original video audio in your project. Any changes made on this track will only affect the original video audio.
Whether you’re adding sound design to live video or motion graphics, these techniques will work for you.

You can:
- Pan
- Adjust Stereo Relation
- Solo
- Mute
- Show/Enable Automation
- Add Track FX
- Toggle Video Frame Preview
- Toggle Waveform Preview if you don’t want to see a waveform overlayed on your Frame Preview.
- Adjust Gain with the Volume Slider on the Track Meter
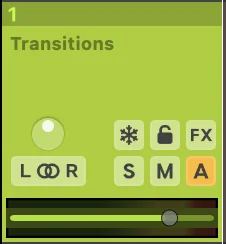
Ruler Track
The Ruler Track contains all markers, time, beat, and bar indicators and the track header gives you global control over all tracks on your timeline.

You can:
- Solo
- Mute
- Lock
- Show/Enable Automation
You can adjust your visual timeline benchmarks in the Ruler drop down menu.

You can also see before 0:00:00 in your timeline by dragging the triangle at the start of the timeline in the Ruler Track to the right.

Audio Tracks:
ADD currently supports up to 100 audio tracks.
Audio Tracks allow you to quickly monitor what type of sounds are on a track as well as allow you to make changes to all regions on the track.

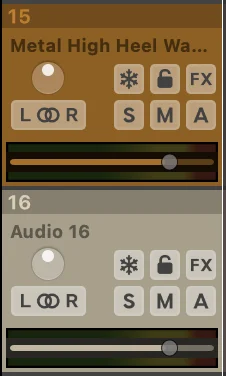
In the Audio Track header you can:
- View Track Number and Name
- Adjust Pan Knob
- Adjust Stereo Relation. Clicking this button once will Flip L/R Stereo. Clicking the button again will make the track Mono. Clicking a third time will reset the track to its original Stereo Relation
- Freeze the track rendering all effects on the regions
- Lock the track preventing any changes from being made to the regions on the track
- Add Track FX, a small plugin chain of effects
- Solo
- Mute
- Show/Enable Automation
- Adjust Gain using the Volume Slider on the Track Meter
You can drag tracks up and down to change their order. The track numbers will automatically adjust depending on their position in the timeline. Only one track can be dragged at a time.
Select multiple consecutive tracks, click on the first track and (⇧-Clicking) on the previous/next track. Or select multiple nonconsecutive tracks by (⌘-Clicking) on the desired tracks. To deselect a track, (⌘-Click) it again.
To delete a track, click on the track head and press (Delete) or press (⌘X) to delete the track and copy its regions to the clipboard.
To delete all empty tracks press (Opt-Delete).
**This is recommended to keep your limited track count low and improve organization**
New Track
Manually
To create a new audio track, go to the Menu Bar and select “Timeline > Add Track”. Or press (⌘N).
Every new track will created under the currently selected track will be named “Audio #” (number of existing tracks).
You can easily rename a track by (Double-Clicking) on the name and typing something in.
Automatically
If you drag a sound from the Library Window onto the Timeline outside of an existing track, or you trigger a sound that can’t be placed on an existing track because it would overlap another sound, a new track will be automatically created.

The track will use the name of the audio file as the track name and the track header color will be assigned to match the color of the corresponding sound. If a track has multiple regions of the same type, ADD will name the track by Type name—for example, “Hits 1” or “Rises 1”. Of course you can always re-name your tracks afterwards.
To avoid creating a new track when triggering a sound, select the desired track for the sound to be placed on, press a trigger [for example (T) for transition], and the region will be placed in the selected track as long as it’s not overlapping another region.
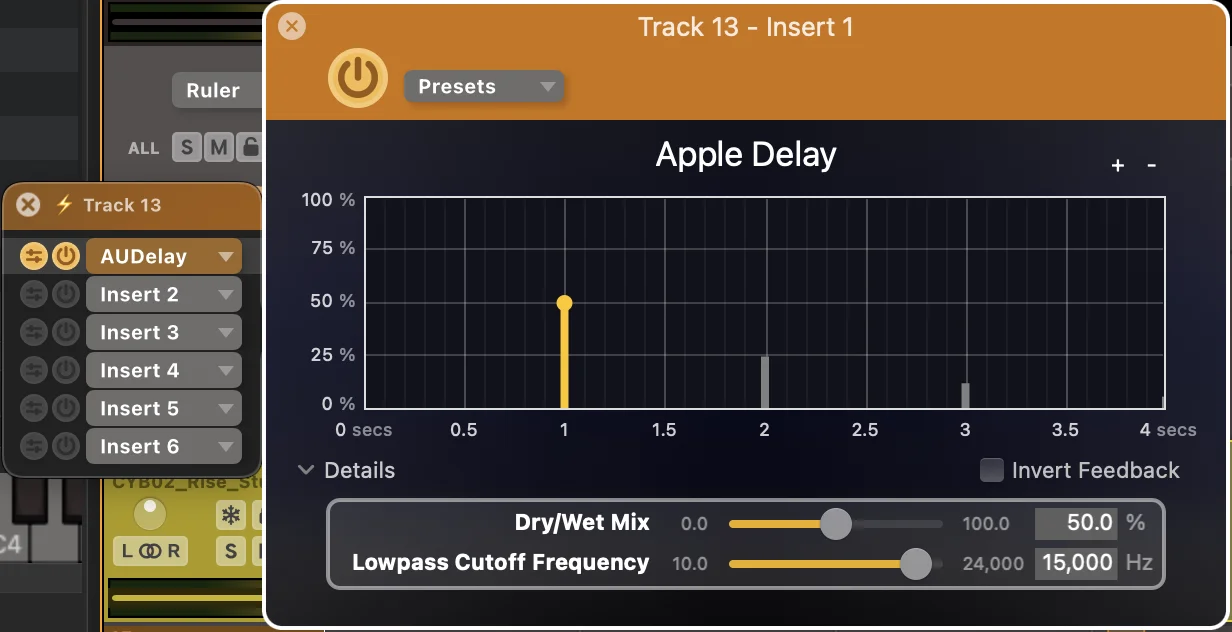
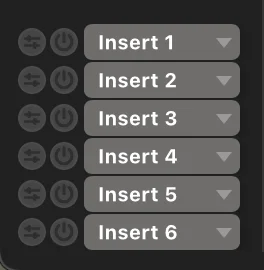
Track FX
You can apply up to 6 plug-ins on each track by clicking the “FX” button in the track head.
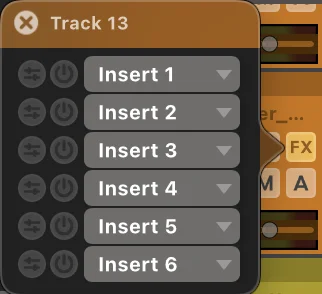
When a plug-in is assigned and enabled, the “Power” button to the left of the insert will light up orange. You can click the orange “Power” button to disable the plug-in without deleting it.

ADD supports all types of plug-in formats
To open the plug-in window, click the grey “Horizontal Faders” button. Pressing the, now orange, “Horizontal Faders” button again will close the plug-in window.
To easily identify which tracks have FX enabled on them, ADD assigns a small “Lightning Bolt” to the track next to the name as well as makes the Track FX button orange.
Assigned and enabled plug-ins can also be found in the Region Editor.
Track Automation
In ADD you have the ability draw-in volume automation. All drawn-in automation is applied to the mix Pre-Fader.

To view and draw Track Automation, click the “A” button and select “View Automation”. Or press (⌥A) on your selected track. When Viewing Automation, if the track is grey, automation is disabled.

While in the Track Automation view, click a spot in the timeline to add a node and drag it to your desired level. If you want to delete automation, simply click a node and press (Delete).
Now to enable Track Automation, click the “A” button in the track header and select “Enable Automation”. Or press (⌥⌘A) on the selected track. The “A” button will appear orange when Automation is enabled and grey when disabled. If disabled, your regions’ volume will bypass any drawn-in track automation.
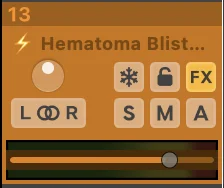
Regions
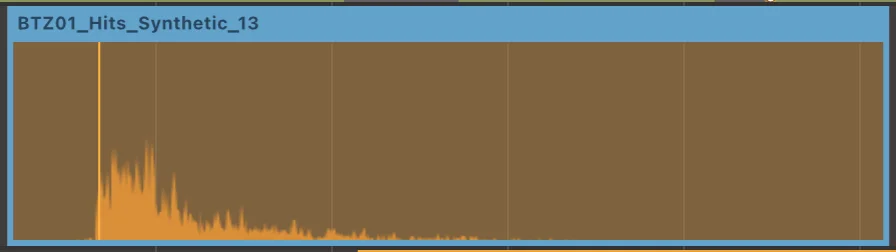
A Region is a single “sonic event” on the timeline. They can be stems, elements, clips, several elements frozen together, stacks, or presets.
Every region displays the waveform and the name of the sound at the top left corner. Regions which come from ADD sound packs display a perforated line symbolizing the Sync Marker. When a region is selected, the color is more saturated. When it’s unselected, it becomes more feint.
When you solo a region, it will be outlined in yellow.
When a region is muted, it will be outlined in blue.
To trim a region, position your pointer to the left or right region and the pointer will turn into an arrow indicating that you are about to grab the region handle. Now (Click-Drag) the region handle to the desired position.

**In ADD, when two regions are overlapped, both regions will sound at the same time. Regions do not overwrite one another**
Region FX
One of the great features of ADD is that plug-ins and mixing controls can be applied to individual regions as well as tracks. The Region FX window is gives you control over your sounds unlike any other DAW.
To open the Region FX window, press (Shift-G).
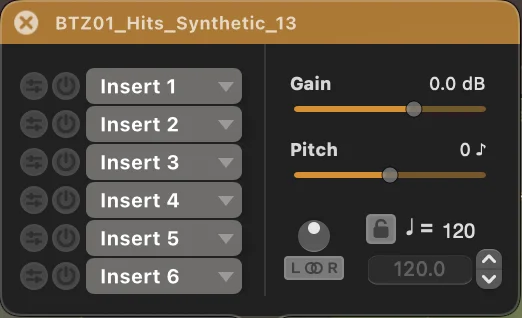
Region Plug-in Chain
Each region allows up to 6 plug-ins in a chain that works the same as Track FX. So if you were to combine Region FX with Track FX, each sound could have up to 12 plug-ins on it! Region FX will play before Track FX.
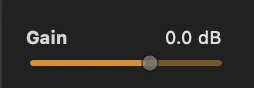
Gain
Each region has its own Gain slider that can be used to fine tune the gain of the region. Gain goes up to +6db and down to -infinity db. If you want further increase gain you need to freeze (render) the region and use the new Region FX window on the frozen region.
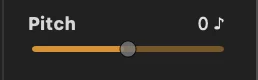
Pitch
Regions have their own Pitch slider that allow you to quickly change the pitch of a sound without inserting a plug-in. The slider goes up/down to 24 semi-tones. If you want to further alter pitch you need to Freeze (render) the region and use the new Region FX window on the frozen region.
Pan
Regions can be panned independently of their tracks. Panning works in percentages and the knob moves in a circular motion.
Stereo Relation
Regions can have independent stereo relation from their tracks. Clicking this button once will Flip L/R Stereo. Clicking the button again will make the region Mono. Clicking a third time will reset the region to its original Stereo Relation.
Tempo
Each region can have its own independent tempo from your Global Tempo settings. The original BPM when recorded will be displayed in white. Clicking the “Lock” icon locks the original BPM of the region regardless of changes to Global Tempo. For more info on Global Tempo see Timeline Toolbar.
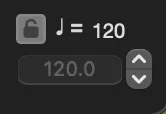
To change the tempo of the region you can type in a BPM or use the up/down arrows to the right.
**If a sound doesn’t have a BPM, such as Foley, this will act as time-stretching the region**
Quick Mix Controls
All of the functions in the Region FX window can be controlled with hotkeys allowing you to quickly and easily mix your regions:
- Gain Up/Down: (Shift-Up/Down)
- Pan Left/Right: (Shift-Left/Right)
- Pitch Shift Up/Down: (Shift-Opt-Up/Down)
- Time-stretch Shorter/Longer: (Shift-Opt-Left/Right)