
The ADD Audio Bridge allows you to easily connect and sync projects between your favorite NLE and Audio Design Desk. It contains several functionalities such as a Transport Bar, a Search Bar for audio, and a way to Trigger audio to make ADD and your favorite NLE feel as connected and seamless as possible.

Transport Bar
The ADD Audio Bridge Transport Bar is very similar to the main ADD Transport Bar but a little more simplified.

From left to right:
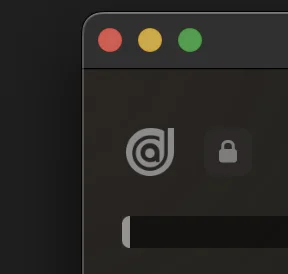
- ADD Logo: Opens ADD if it isn’t already opened. Also acts as an indicator signaling if ADD is connected. Grey when ADD isn’t connected and Orange when it is.
- Lock: This locks the playheads in sync so moving the playhead in one app moves the playhead in the other.
- Return to Beginning: Moves the playhead back to the beginning of the project.
- Previous Marker: Moves the playhead to the previous marker.
- Nudge Backwards: Moves the playhead backwards by a frame. If a region is selected, this will nudge the region back by a frame instead.
- Play: Starts and stops playback of the project.
- Jump to End: Moves the playhead to the beginning end of the project.
- Next Marker: Moves the playhead to the next marker.
- Nudge Forwards: Moves the playhead forward by a frame. If a region is selected, this will nudge the region forward by a frame instead.
- Replace: Replaces the selected region(s).
- In: Sets an “In Point” on the ADD timeline.
- Out: Sets an “Out Point” on the ADD timeline.
- Remove In/Out: Removes any placed “In/Out Points” on the ADD timeline.
- Timeline Preview: Shows the position of the playhead on the timeline as well as the position and type of regions placed in your project.
- Refresh: Refreshes the Timeline Preview to reflect any changes made to your project such as new regions or new Beginning/End timecodes.
Search Mode
Search Mode allows you to type in a sound then have ADD search for and place the sound on the ADD timeline.

In the example above, “car crash” was searched for and ADD found the sound with corresponding “car, crash” metadata and placed it on the timeline at the point of the playhead.
Trigger Mode
Trigger Mode allows you to trigger sounds in real-time during playback on the ADD timeline. You can trigger any sound design or music elements on our preset triggers or even use custom triggers.

In the example above, the “H” key was pressed and the corresponding sound design type “Hit” was added to the timeline at the point of the playhead.
Final Cut Pro
The ADD Audio Bridge exists as an extension within Final Cut Pro. The extension will automatically download and install within Final Cut Pro once you have downloaded and installed Audio Design Desk.
To find the ADD Audio Bridge, click the Extension Icon (puzzle piece) in the top left menu bar inside of Final Cut Pro.

If the ADD Audio Bridge is the only extension you have in Final Cut Pro, it will appear as the Audio Design Desk Logo at the top, not a puzzle piece.
Connect to ADD
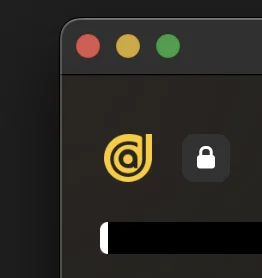
Once you have opened the Bridge from the extension inside of Final Cut Pro, you can click the ADD logo in the top left to open and connect ADD.
The bridge will have color once connected.
If ADD was already open when opening the Audio Bridge extension within Final Cut Pro, go to ADD and click the drop down arrow next to the Timecode.
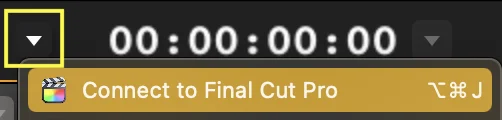
Select “Connect to Final Cut Pro” and Final Cut Pro will now be connected to ADD.
Import to ADD
To Import your project from Final Cut Pro into ADD, grab the project from the Events Window in Final Cut Pro and drag the project into the ADD Audio Bridge.

Once you drag the project over you will see two options:
- Send Audio and Session Data: This will import all session data (Start Timecode, Frame Rate, Sampling Rate, Project Name, Markers) as well as any Audio Regions into ADD
- Send Session Data: This only imports session data into ADD.
When importing markers, it is possible to have ADD parse through those markers and auto-populate your timeline with sounds related to what is written in the markers. For more information see, Import Project.
Export to Final Cut Pro
Once you finished adding sounds to your project, you can easily Export those sounds back into Final Cut Pro. You have two options when exporting sounds via the ADD Audio Bridge.

Bounce
Creates a stereo mix-down of the entire project or a selected portion of the project.
- Set your “In/Out Points” in ADD.
- Click the Bounce button in the ADD Audio Bridge.
- Once the file is create it will say “Ready”.

Click-Drag the file into your Final Cut Pro timeline

The file will be placed at the position of the “In Point” in Final Cut Pro.
Import Project
Creates a Final Cut Pro XML session of you project or the selected portion of the project using “In/Out Points”. Due to some limitations in Final Cut Pro, there are a few extra steps involved when importing the project.
- Set your “In/Out Points” in ADD.
- Click the Import Project button in the ADD Audio Bridge.
- Once the file is create it will say “Ready”.
- Click-Drag the file into your Final Cut Pro Events Window.

- Final Cut Pro will alert you that a project of the same name already exists. Click “Keep Both”.

- Open the new project in Final Cut Pro and select All by pressing (CMD-A)
- Now press (CMD-C) to copy the audio regions.
- Go back to the original project and move the playhead to the same position as your “In Point”.
- Press (CMD-V) to paste the audio regions.

All of the audio regions from your ADD project (or a specific section of your project) are now imported into Final Cut Pro. The audio regions will adhere to the assigned audio roles within Final Cut Pro so the audio regions stay easily organized in your project. You can now delete the project that was newly created in order to copy and paste the audio.
Connect NLE to DAW
Not only can you connect Final Cut Pro to ADD, it is possible to further connect Final Cut Pro to a DAW via MIDI Time Code using ADD as a bridge!
To learn how to connect ADD to a DAW, go to Sync MIDI Time Code.
When setup correctly, Final Cut Pro, ADD, and your preferred DAW will all be connected and in sync with each other allowing for endless integration and creation between video and audio.

Out of Sync
If you have followed the setup correctly but find that the timecodes between your NLE and ADD are losing sync, there are few things to check.
- Frame Rate: Project frame rate in you ADD needs to be the same in your NLE.
- Sample Rate: Project audio sample rate in you ADD needs to be the same in your NLE.
- Start Timecode: The project start timecode in you DAW needs to be the same in your NLE.
You can check all of these settings in ADD’s Project Settings window by clicking the drop down arrow to the right of Timecode in the ADD Transport Bar.
